Spring Cloud Alibaba 是阿里巴巴结合自身微服务实践,开源的微服务全家桶。
一个更易于构建云原生应用的动态服务发现、配置管理和服务管理平台。【注册中心及配置中心】
使用文档:
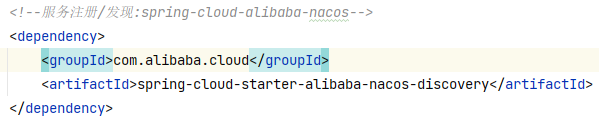
将 nacos 接入到 gulimall-common 中,作为注册中心:
下载 nacos 注册中心,
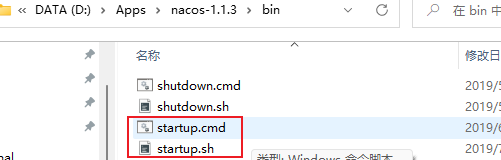
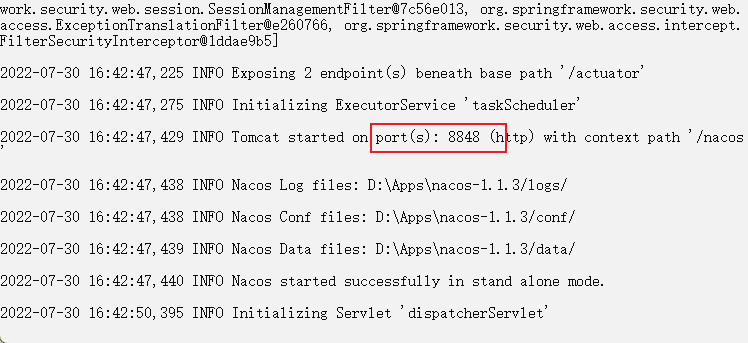
启动注册中心:解压文件,双击 bin 目录下 starup.cmd
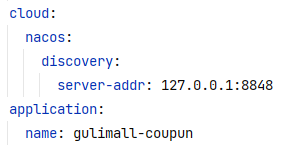
在 5 个 gulimall 的微服务模块中,在 resources/application.yml 文件中填写 nacos 地址 127.0.0.1:8848,并指定名称
这里可以在 application.propeties 文件中写注册地址和名称吗?
直觉觉得可以,propterties 和 yml 文件都是配置文件,只不过是文本格式不同
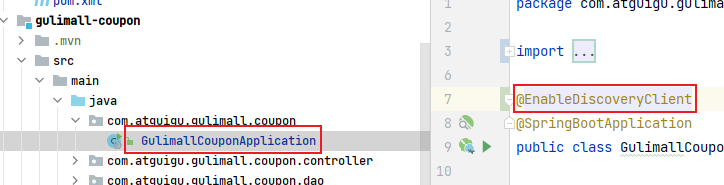
使用@EnableDiscoveryClient注解,分别在 5 个微服务的应用类前开启 5 个 gulimall 的注册功能,使得该服务可以注册到发现中心。
其他模块图略。
测试是否成功,启动com.atguigu.gulimall.coupon.GulimallCouponApplication,浏览器打开 127.0.0.1:8848/nacos,使用默认的登录名 nacos 和密码 nacos 登录。
同理注册其他 gulimall 的微服务模块
在 gulimall-common 中,引入 nacos config starter 依赖
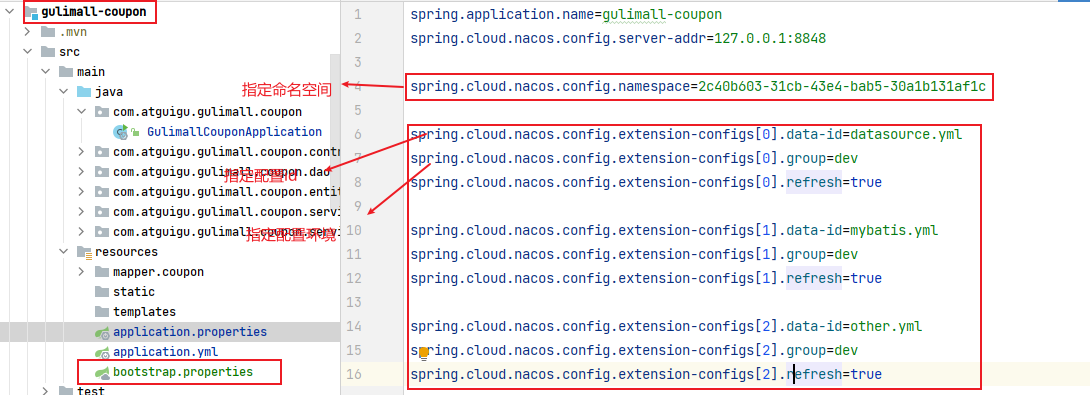
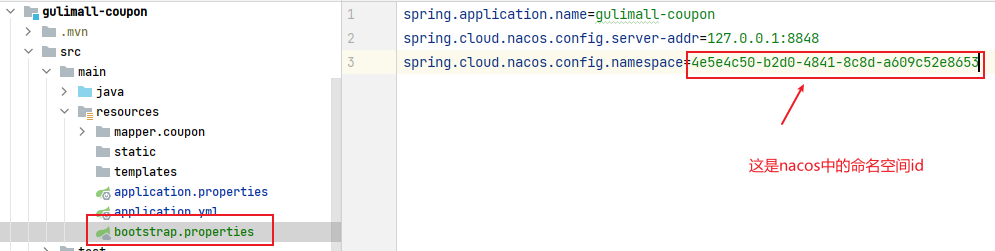
给需要使用配置中的微服务模块resources路径下创建bootstrap.properties【本例 gulimall-coupon】
1
2
spring.application.name =gulimall-coupon #当前微服务/程序的名称 spring.cloud.nacos.config.server-addr =127.0.0.1:8848 #配置中心的ip地址(同注册中心)
测试配置中心:
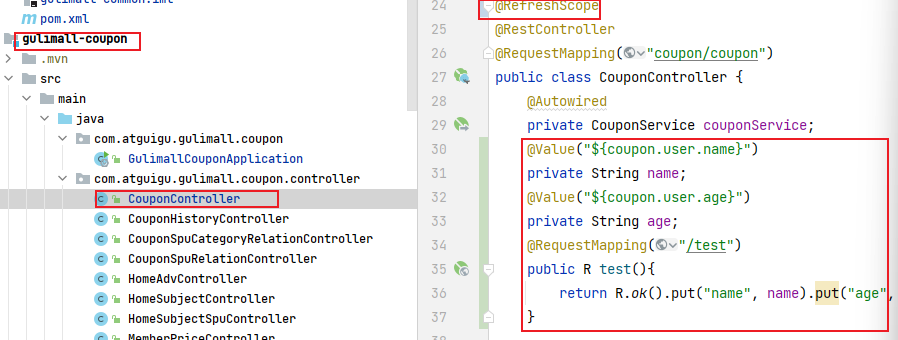
在需要测试的控制器类中编写方式,定义测试属性,并给该类添加@RefreshScope注解、属性添加@Value注解
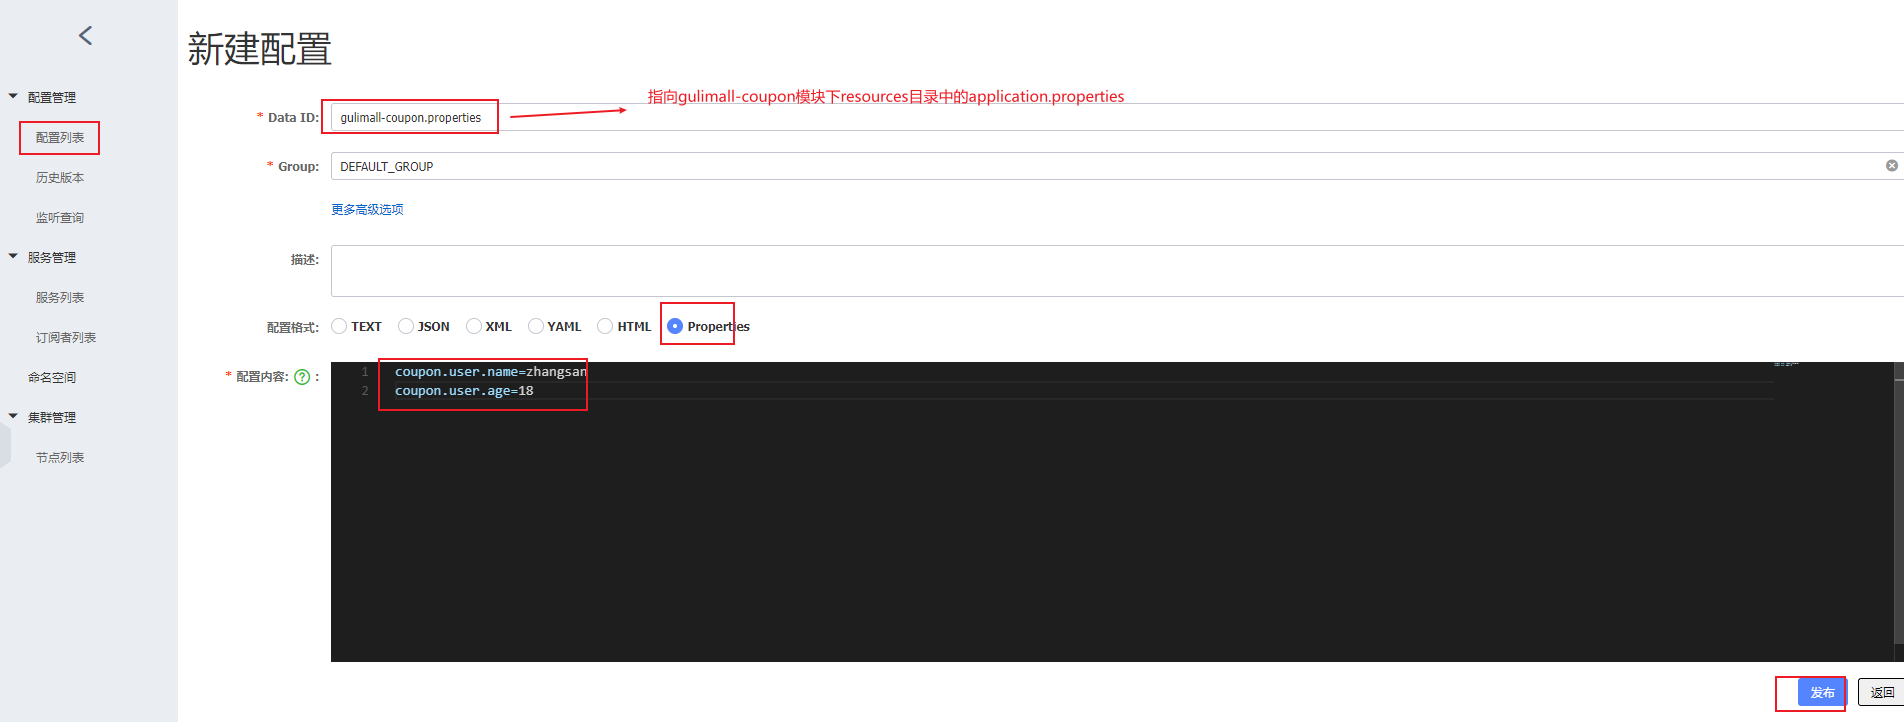
在 nacos 配置中心给上面定义的测试属性进行初始化
nacos 配置中心相关概念
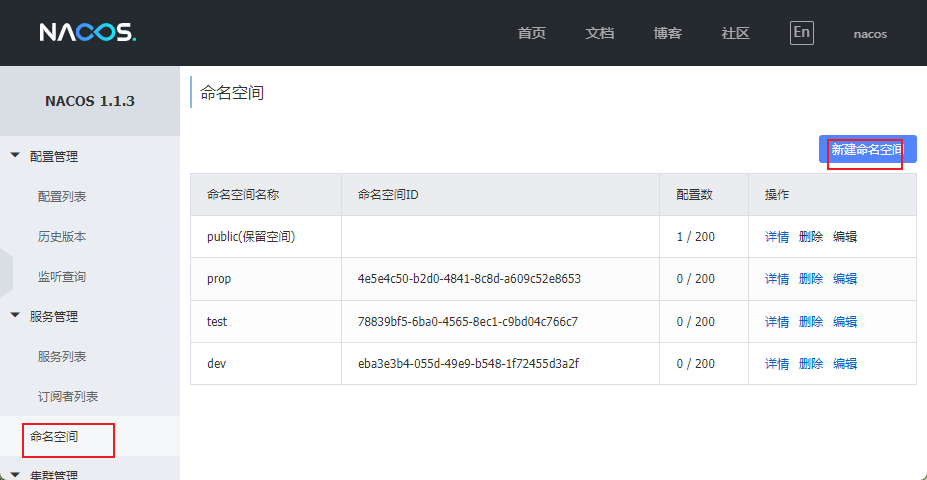
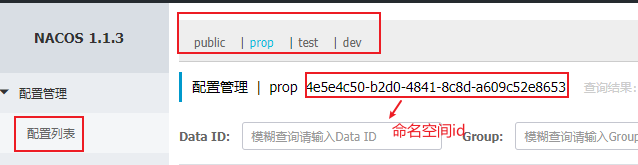
命令空间:默认为 public,默认新增的所有配置都在 public 空间,用于配置隔离,可以基于环境设置隔离,比如开发、测试、生产环境;也可以基于服务设置隔离,
创建命名空间后,可以在配置列表中进行使用,需要切换则需要在bootstrap.properties中设置spring.cloud.nacos.config.namespace=2c40b603-31cb-43e4-bab5-30a1b131af1c
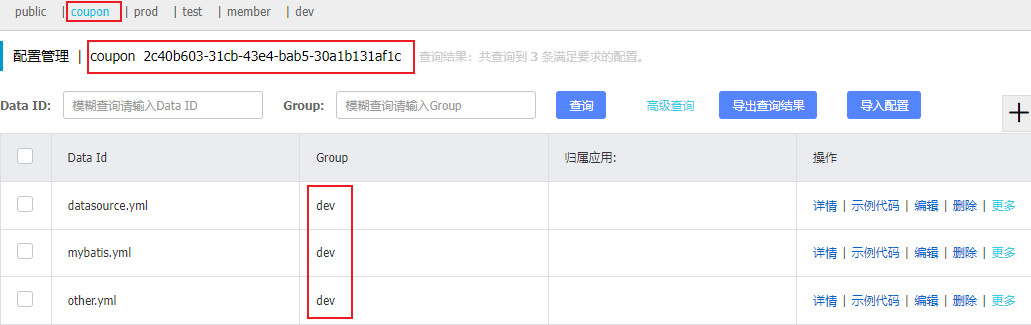
配置集:所有配置的集合。
配置集 ID:Data Id,类似文件名
配置分组:默认所有的配置集都属于 DEFAULT_GROUP
切换分组:在bootstrap.properties文件中设置spring.cloud.nacos.config.group=DEFAULT_GROUP
使用 nacos 配置中心管理多个配置集,代替 resourcers/application.yml 文件,并在bootstrap.properties文件中进行设置,指定 nacos 配置中心要管理的配置文件。
按照上述配置后,就不需要 resourcers/application.yml 文件了
命名空间:用于进行租户粒度的配置隔离。 不同的命名空间下, 可以存在相同的 Group 或 Data ID 的配置。 Namespace 的常用场景之一是不同环境的配置的区分隔离, 例如开发测试环境和生产环境的资源(如配置、 服务) 隔离等。
自动注入:NacosConfigStarter 实现了 org.springframework.cloud.bootstrap.config.PropertySourceLocator 接口, 并将优先级设置成了最高。在 Spring Cloud 应用启动阶段, 会主动从 Nacos Server 端获取对应的数据, 并将获取到的数据转换成 PropertySource 且注入到 Environment 的 PropertySources 属性中, 所以使用@Value 注解也能直接获取 Nacos Server 端配置的内容。
1
2
3
4
5
spring.cloud.nacos.config.server-addr =127.0.0.1:8848 spring.cloud.nacos.config.namespace =31098de9-fa28-41c9-b0bd-c754ce319ed4 spring.cloud.nacos.config.ext-config[0].data-id =gulimall-datasource.yml spring.cloud.nacos.config.ext-config[0].refresh =false spring.cloud.nacos.config.ext-config[0].group =dev
每个微服务创建自己的 namespace 进行隔离, group 来区分 dev, beta, prod 等环境。
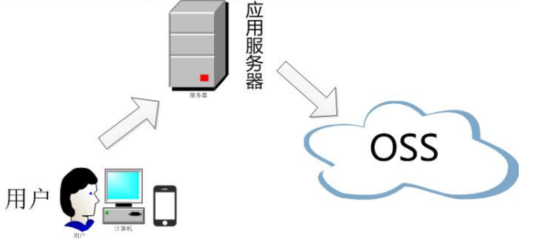
文件提交给微服务,微服务发送到阿里云 OSS
1
2
3
4
5
6
7
8
9
10
11
12
13
14
15
16
17
18
19
20
21
22
23
24
25
26
27
28
29
30
31
32
33
34
35
36
37
@RunWith(SpringRunner.class) @SpringBootTest public class GulimallThirdPartyApplicationTests { @Resource OSSClient ossClient; @Test public void testUpload2 () { String bucketName = "gulimall-brands-logo" ; String objectName = "3-2.jpg" ; String filePath= "C:\\Users\\iceri\\Documents\\3.jpg" ; try { InputStream inputStream = null ; try { inputStream = new FileInputStream (filePath); } catch (FileNotFoundException e) { e.printStackTrace(); } ossClient.putObject(bucketName, objectName, inputStream); } catch (OSSException oe) { System.out.println("Caught an OSSException, which means your request made it to OSS, " + "but was rejected with an error response for some reason." ); System.out.println("Error Message:" + oe.getErrorMessage()); System.out.println("Error Code:" + oe.getErrorCode()); System.out.println("Request ID:" + oe.getRequestId()); System.out.println("Host ID:" + oe.getHostId()); } catch (ClientException ce) { System.out.println("Caught an ClientException, which means the client encountered " + "a serious internal problem while trying to communicate with OSS, " + "such as not being able to access the network." ); System.out.println("Error Message:" + ce.getMessage()); } finally { if (ossClient != null ) { ossClient.shutdown(); } } } }
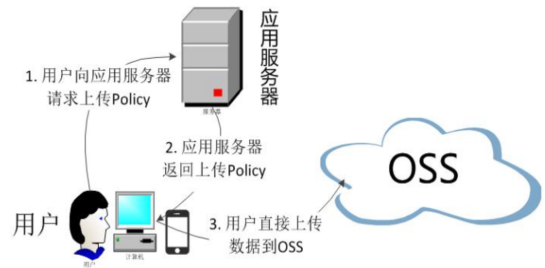
浏览器找 gulimall-third-part 索要签名,浏览器拿到签名后,直接上传到 OSS 服务器
1
2
3
4
5
6
7
8
9
10
11
12
13
14
15
16
17
18
19
20
21
22
23
24
25
26
27
28
29
30
31
32
33
34
35
@RequestMapping("oss/policy") public R policy () { String host = "https://" + bucket + "." + endpoint; String format = new SimpleDateFormat ("yyyy-MM-dd" ).format(new Date ()); String dir = format + "/" ; Map<String, String> respMap = null ; try { long expireTime = 30 ; long expireEndTime = System.currentTimeMillis() + expireTime * 1000 ; Date expiration = new Date (expireEndTime); PolicyConditions policyConds = new PolicyConditions (); policyConds.addConditionItem(PolicyConditions.COND_CONTENT_LENGTH_RANGE, 0 , 1048576000 ); policyConds.addConditionItem(MatchMode.StartWith, PolicyConditions.COND_KEY, dir); String postPolicy = client.generatePostPolicy(expiration, policyConds); byte [] binaryData = postPolicy.getBytes("utf-8" ); String encodedPolicy = BinaryUtil.toBase64String(binaryData); String postSignature = client.calculatePostSignature(postPolicy); respMap = new LinkedHashMap <String, String>(); respMap.put("accessid" , accessId); respMap.put("policy" , encodedPolicy); respMap.put("signature" , postSignature); respMap.put("dir" , dir); respMap.put("host" , host); respMap.put("expire" , String.valueOf(expireEndTime / 1000 )); } catch (Exception e) { System.out.println(e.getMessage()); } return R.ok().put("data" , respMap); }
注意:这里要设置阿里云 OSS 允许跨域。
将阿里云短信服务封装成工具类,会员登录时模块 12,工具模块是 05,而模块 12 依赖了模块 17,模块 17 依赖了模块 05,根据依赖的传递性,在模块 05 中添加阿里云短信服务
1 2 3 4 5 <dependency > <groupId > com.aliyun</groupId > <artifactId > dysmsapi20170525</artifactId > <version > 2.0.18</version > </dependency >
1 2 3 4 5 6 7 8 9 10 11 12 13 14 15 16 17 18 19 20 21 22 23 24 25 26 27 28 29 30 31 32 33 34 35 36 37 38 39 40 41 42 43 44 45 46 47 48 49 50 51 52 53 54 55 56 57 58 public static ResultEntity<String> sendShortMessage (String accessKeyId, String accessKeySecret, String endpoint, String signName, String templateCode, String phoneNum) { Config config = new Config (); config.setAccessKeyId(accessKeyId); config.setAccessKeySecret(accessKeySecret); config.endpoint = endpoint; Client client = null ; try { client = new Client (config); } catch (Exception e) { e.printStackTrace(); } SendSmsRequest sendSmsRequest = new SendSmsRequest (); sendSmsRequest.setSignName(signName); sendSmsRequest.setTemplateCode(templateCode); sendSmsRequest.setPhoneNumbers(phoneNum); String code = "" ; int rand; for (int i = 0 ; i < 4 ; i++) { rand = (int ) (Math.random() * 10 ); code += rand + "" ; } sendSmsRequest.setTemplateParam("{\"code\":\"" + code + "\"}" ); RuntimeOptions runtimeOptions = new RuntimeOptions (); int statusCode; try { SendSmsResponse sendSmsResponse = client.sendSmsWithOptions(sendSmsRequest, runtimeOptions); statusCode = sendSmsResponse.statusCode; if (statusCode == 200 ) { return ResultEntity.successWithData(code); } return ResultEntity.failed(sendSmsResponse.toString()); } catch (TeaException error) { String errMessage = Common.assertAsString(error.message); return ResultEntity.failed(errMessage); } catch (Exception e) { TeaException error = new TeaException (e.getMessage(), e); String errMessage = Common.assertAsString(error.message); return ResultEntity.failed(errMessage); } }
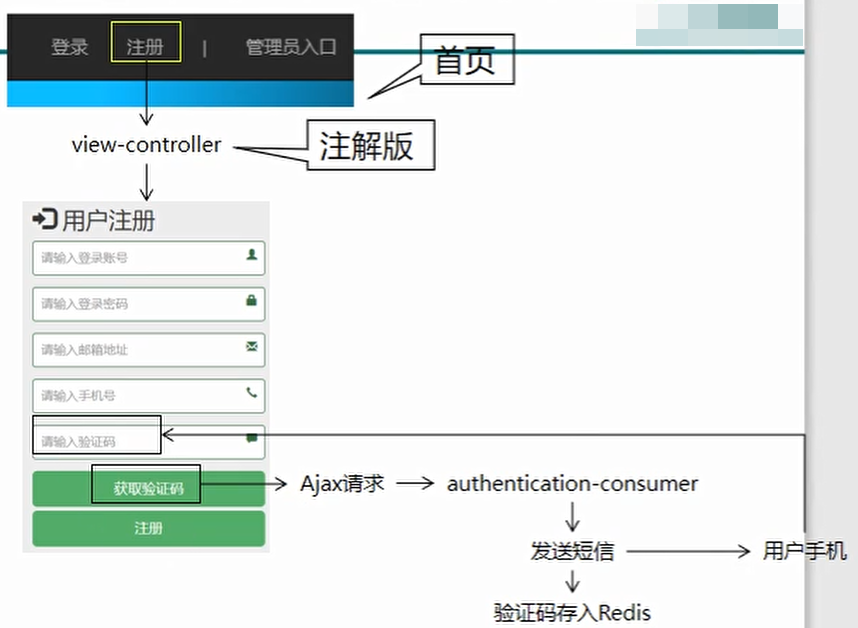
基础功能(发送验证码):
防止点击 button 按钮表单刷新:
首次请求响应超时:
1
2
3
ribbon: ReadTimeout: 1000 ConnectTimeout: 10000
原文链接: https://sk370.github.io/2022/10/29/springcloudalibaba/SpringCloudAlibaba/
版权声明: 转载请注明出处。